Categories
Calendars
Guides
Reviews
Archive
Gallery
Articles
Ask Our Gardening Expert
HERBS, FRUIT AND VEGETABLES
TO GROW AT SCHOOL
Preparation
If the soil is too hard to dig with a trowel, there's no choice
but to dig the area over with a spade at first.
Make sure the ends of the sticks are covered with
something (a plastic bottle for example) to avoid anyone damaging their
eyes.
Fruit and Vegetables For Schools
One problem with vegetables and fruit is that many of them are ready
for harvest in mid to late summer, just when schools go on summer holidays.
To help with that problem we have listed some fruit and vegetables that
are ready from early June and to the beginning of the school holidays. We have also listed a few that are
ready for harvest from early September onwards which can stand some neglect
in the summer holidays. Click here
for the vegetable list,
click here for the herb and fruit list.
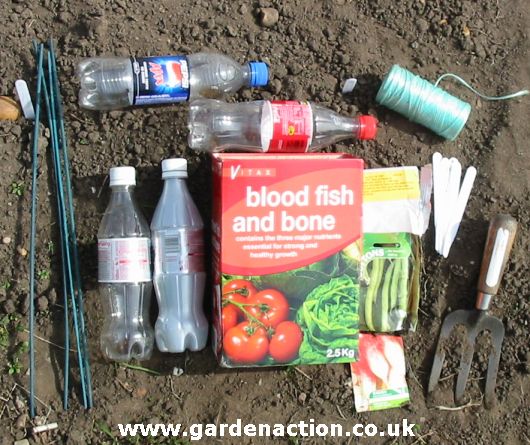
Some of the things you may need.
 Identify the area to be dug by putting sticks in the
ground at the four corners and then tying string round them to enclose
the area to be dug.
Identify the area to be dug by putting sticks in the
ground at the four corners and then tying string round them to enclose
the area to be dug.
Feeding
Apply a
handful of this per square metre to the surface and lightly dig in
to the soil surface.
Soil with fertiliser on it
The plants need food and there are two ways of doing this
(better is both). Apply a long lasting fertiliser to the soil
immediately after digging. Use something like blood, fish and bone
which is available at most of the diy and nursery stores.
This will last the plants a couple of months or more. The other way is to sprinkle a general fertiliser such as Growmore on the soil. This will give instant good to the plants but will only last a week or so. Only apply a general fertiliser when the seedlings have emerged, not when sowing the seeds.
Sowing Seed
With a
trowel, dig out a shallow indentation in the soil in a straight
line. Then sprinkle the seed in the indentation at the spacing
advised on the seed packet. Cover the seeds with soil and pat it
down gently with your hands.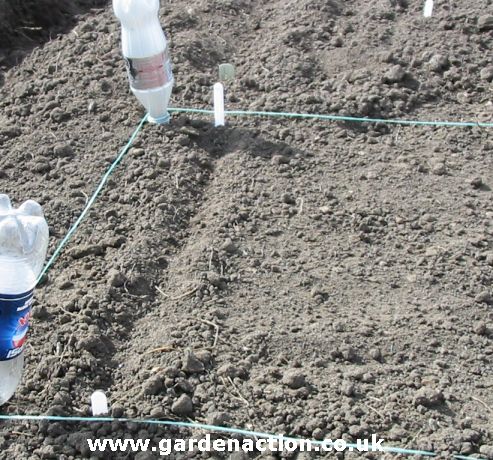 First, read the instructions on the seed pack.
Different seeds need to be planted in different ways.
First, read the instructions on the seed pack.
Different seeds need to be planted in different ways.
Write on two markers the name of the seed and the date planted. Place markers (the little white plastic sticks in the picture) at both ends of the seeds.
There is a very good reason for sowing the seeds in a straight line and marking the beginning and ends of the seeds. When the seeds emerge in a few weeks time, so will weed seedlings, all over your newly dug vegetable plot. Even to experienced eyes, it is difficult to differentiate between a weed seedling and a vegetable seedling! But if the seeds are in a straight line and the beginning and ends are clearly marked then it will be much easier to identify the straight line of seedlings.
One solution, shown in the picture, is to use strips of paper with
the seeds stuck into them. Some seeds are very fine and this makes them
difficult to sow at the correct spacing. If you sow too many then
unwanted pests may be attracted to the seedlings when you thin them
out - this applies particularly to carrots.
Some seeds are very fine and this makes them
difficult to sow at the correct spacing. If you sow too many then
unwanted pests may be attracted to the seedlings when you thin them
out - this applies particularly to carrots.
These seed strips are available at many seed merchants, including Suttons. The picture above shows us laying the seed strip in the indentation in the soil. Simply cover the strip with soil and then firm it down gently with hands.
Don't just lightly wet the soil surface, give them a
good watering. But do it gently so that the force of the water
doesn't wash the seeds awasy.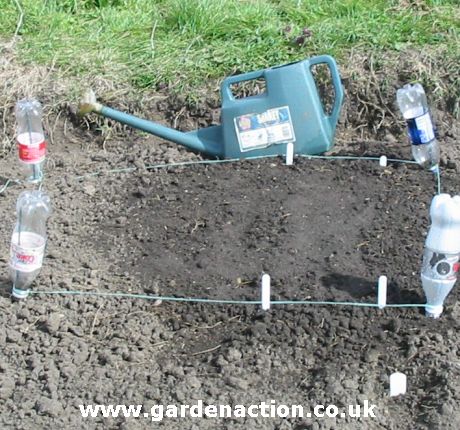 A watering can will be essential throughout warm times. But the
seeds should also be watered in immediately after sowing if the
conditions are at all dry. This will help
germination.
A watering can will be essential throughout warm times. But the
seeds should also be watered in immediately after sowing if the
conditions are at all dry. This will help
germination.
GO TO LIST OF VEGETABLES SUITABLE FOR SCHOOLS